Saturday, December 31, 2011

Ferns with Feet


Davallia fejeensis rhizomes up close

Notice the shallow pot.

Rabbit's foot, bear's paw, kangaroo paw, green worm. What do all these names have in common? They all describe types of "footed" ferns. The "feet" are really rhizomes that creep and crawl across the top of the soil surface, sometimes even covering and surrounding the pot. Of course, they may be crawling across rocks or some other surface. I had a rabbit's foot fern on a Hawaiian rock, but it unfortunately contracted a horrible case of scale and now resides in the trash. These ferns are quite susceptible to scale. They can be treated, but I decided it wasn't worth risking my other plants, and so got rid of it. 
My rabbit's foot fern looks the best of the four types of these ferns I have. It is in a shallow container, and that is all the soil it needs. The rhizomatous ferns have shallow root systems. They creep along the ground or over rocks in their native habitats. They will all thrive in moderate to bright light. Mine are in an East window and are doing well.  Obviously from the picture, you can see the kangaroo paw fern isn't doing quite as well. It looked great when I bought it, but has gone down hill since. I've re-potted it and am hoping it turns around.


Top view of rabbit's foot fern


These ferns come from South East Asia, Japan, and Australia. The rabbit's fern comes from Fiji, thus the botanical name.  They can be epiphytic or terrestrial, they like high humidity and bright, filtered light, and  need well-drained soil. Never let them dry out too much. I have done that to my caterpillar fern and it loses some leaves, but comes back just fine. Of course, I don't recommend this, but I think the rhizomes hold an extra amount of moisture, and this feature has saved my plant more than once. They really want to stay evenly moist. They are great plants for hanging baskets, as their "feet" can be seen better from below. I have mine on plant stands, so they are visible. 
They are able to be propagated quite easily. They can be separated or started from a piece of rhizome. Cut a piece of rhizome away from the plant, making sure it has a frond attached to it. Lay the rhizome on top of the soil surface and pin it down to the soil to keep it upright. Keep it moist and it should root and take off creeping across the soil in no time.

Caterpillar fern~Polypodium formosanum
The caterpillar fern is also called the worm fern, the E.T. fern, and the naked rabbit's foot fern. This is a good example of why the Latin name should always be used to identify your plants. These are four names for the same plant and there may be more. If I identify it by using the Latin name, Polypodium formosanum, there will never by any question about which plant I am referring to.


Top view of Polypodium formosanum

Polypodium formosanum up close
This is the kangaroo paw. It was very beautiful and full when I bought it. It is looking better now that I've re-potted it, but still has a lot of recovering to do.
Kangaroo Paw~ Microsorium diversifolium


These pictures of the bear's paw fern, are from Phipp Conservatory. My plant is young, and the rhizomes aren't very prominent, so I used these pictures instead. The Phipp Conservatory is a wonderful place, by the way. I didn't have much time there, but could have spent all day.


Bear's paw fern~ Aglaomorpha meyeniana
Bear's paw fern at Phipp Conservatory in Pittsburgh
Try one of these unusual, interesting ferns. They aren't your run-of-the-mill ferns and they can be a real conversation piece. They are great plants for children also. They can't help but be interested in fuzzy, wormy-looking plants. Who wouldn't be? 

Friday, November 18, 2011

Holiday Cactus

             
 I love this time of year. The holiday season is here, and it's time for the Thanksgiving cactus to bloom. Some of mine are in bloom, but the Christmas cactus are just budding up. What is the difference? Thanksgiving cactus, or Schlumbergera tuncata, is also called claw cactus, because it's stem segments have pointed teeth on them. The Christmas cactus, or Schlumbergera bridgesii, have stem segments that are more rounded. Usually they are just called Christmas cactus or holiday cactus. Whatever you call them, they are beautiful, holiday-time blooming plants.   Most of these pictures are from last year, but they are all in bud, and the peach one is blooming right now. Other than my African violets, I think they are the most beautiful blooming houseplants.

Let's talk about them for a minute. They are cactus, but not the kind you usually think about. They are jungle cactus, growing in the forks of trees in the jungles of South America. They are epiphytic, meaning they live on trees, but are not parasitic, meaning they do not draw nourishment from the plant they are on. Their nourishment comes from the debris that gathers in the forks they are growing on. They grow like orchids and staghorn ferns, just to name a couple.
Because they grow on trees, they would prefer not to be in full sun, even in the house. If taken outside for the summer, place them in a shaded, or filtered sun area. Their biggest requirement is warmth and lots of humidity. They are from the jungle, remember. If they are kept too cold, the yellow and white varieties will have a pink tinge to them. A well-drained soil is a must. Being epiphytic, they do not grow in soil per say, but in the debris that collects in the forks of the trees..
The biggest problem seems to be getting them to re-bloom. The key is too keep them dry in the month of September. Cool night temperatures in the fall help trigger blooming as well. The shorter days and longer nights of fall are also an important factor, and keeping them in the living room where the lights are on all evening can hinder blooming. Many people place them outside for the summer and keep them out until the temperatures are in the 50's and even high 40's. Mine stay inside, so I don't turn the heat on in my sun room until it's quite cold. I've never had my plants not bloom, so I lean toward the cool temps. I'm not always on top of the water, either, so that may also factor in. Following  are a few pictures of my plants in bloom. What's not to like?


November 16, 2011


Many people have a plant that belonged to their grandma, who got it from their grandma, and so on. This is a long lived plant and one that is easily shared. When pruning them in the spring, take the cuttings and root them in soil, and you can share your plants with family and friends. Pruning will increase the blooms next year as well, so its a win, win situation. You increase the blooms of your plant and share a great plant with someone else!

Saturday, November 5, 2011

Patterned Plants


Haworthia limifolia


Gasteria batesia
One of the most beautiful aspects of plants is the pattern of their leaves. I'm not just talking about variegation, but also the arrangement and texture. Some of the most amazingly patterned plants are succulents. Haworthias and gasterias are a couple of my favorites. 
Haworthia limifolia, or washboard haworthia definitely looks like a washboard, thus the common name. It's leaves are also arranged in a swirled pattern. I love it!
Gasteria batesiana is a small plant with rough, warty leaves. Gaster, the Greek word for stomach, refers to their flowers, which resemble the shape of a stomach. Both plants are native to South Africa, but prefer a bit of shade, gasterias taking on a reddish tinge when in too much sun.
Most people think of sansevierias as the mother-in-law's tongue or snake plant. (Who comes up with these common names?)  These names apply to the tall, sharp leaves of the most common variety of snake plant. I love the upright varieties, but my favorite is the bird's nest sansevieria. This variety forms a low rosette, thus the common name. Golden hanii is a beautiful variegated form, and quicker than you think, forms a cluster of these rosettes.

'
Sansevieria 'Golden Hahnii'
Aeonium 'Kiwi' is a gorgeous plant, especially in plenty of sun, as that is when its red edged leaves are at their most vibrant. Aeonium 'Schwarzkopf' is a beautiful dark burgundy, almost black in full sun. These very popular succulents are a great addition to your indoor plant family. They will lose some of their vibrant color indoors, though, the burgundy of the 'Schwarkopf' turning to a dark green, and the 'Kiwi's' red edge fading to pink or even disappearing.

Aeonium 'Kiwi'


Aeonium 'Schwarzkopf'


Euphorbia nerofolia variegata
 The euphorbia nerofolia variegata not only has two toned foliage, but the stem is also variegated to match the leaves. I saw this plant in a garden center in Chicago, but the over $100 price prevented me from taking it home. (I like being married.)

Let's move on to some non-succulent plants. Piper crocatum has beautiful marbled foliage. The unique feature of this plant though, is the sunken vein areas, which gives it a quilted appearance. It also has a purplish tinge on the backside of the leaf. This vining plant would prefer to be in a humid conservatory with ample warmth, but the beauty of the plant makes it worth a try in your home.
Piper crocatum
Microsorum thailandicum
Two ferns that are interesting and extremely unique are the oil fern and the crocodile fern, both surprisingly, in the same family.
The oil fern, Microsorum thailandicum, is native to Thailand as its name implies. It is ephphytic, and looks as if it's been dipped in metallic blue paint. It needs to be kept humid to keep this unusual coloring.  The one shown is in the fern room at the Lincoln Park Conservatory in Chicago, growing in near perfect conditions. The crocodile fern, is fairly new to the market. Its leaves have the appearance of crocodile skin. It can tolerate low light, but would also like some extra humidity and evenly moist soil. I have mine growing in an East window and its doing great. The one pictured is also in the Lincoln Park Conservatory.


Crocodile fern~ Micorsorum musifolium 'Crocodyllus'
I could go on forever. There are endless choices out there, so next time you are shopping for a plant, pay attention not only to the color and shape of the leaves, but the texture also. These kinds of plants, with warts, crocodile skin, and blue metallic leaves are also a great way to interest children in the wonderful world of plants. They are the next generation of plant lovers and we need to get them involved when they are young.


Friday, October 28, 2011

Frozen Plants?

Poor, cold brugmansia.
Well, we had our first frost last night, here at my house. Where are some of my houseplants? Outside, freezing. I've been procrastinating bringing my plants in. Why? I'm a procrastinator. There you have it. Yes, they are coming in today. It barely froze, so they should be okay, as most are on the front porch and the others are on the back patio, in protected areas.
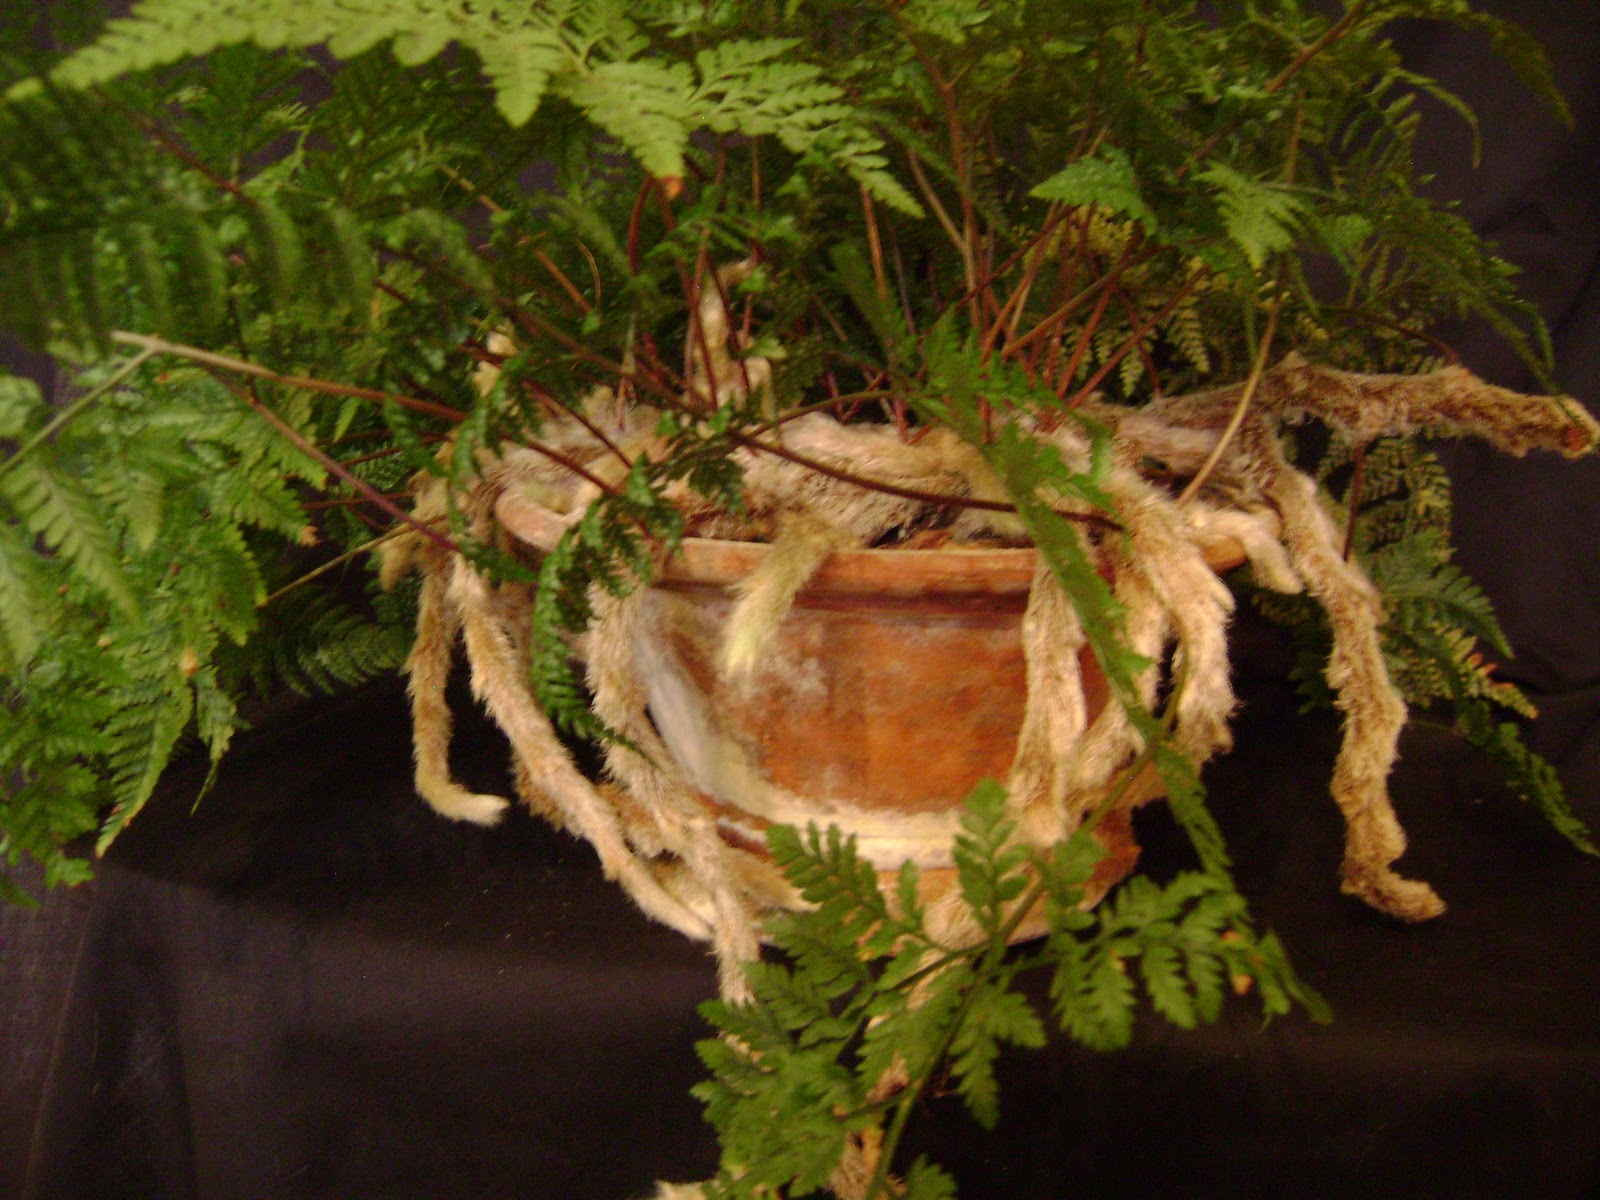
I've been so busy and I really wanted to treat them with a systemic insecticide before I brought them in. I know there are differing opinions on this practice.  I have a lot of plants in the house that never see the outdoors, and I'd like them to stay healthy, so the plants coming in are treated. I don't normally recommend treating a plant that does not have an obvious insect infestation. Yet, I'm not taking any chances with my plants inside. Only my brugmansia, plumeria, hibiscus, passion vine, and ixora are taken outside for the summer.  I also have to bring in the new plants I've acquired over the summer. These include a staghorn fern, a jatropha, and some succulents. I just can't throw them away, much to my husband's chagrin. I think he is the procrastinator, hoping I will forget about them, since I count on him to carry them in. Well, today is the day and they are on their way in.
One of my favorite sayings, "Do as I say, not as I do", applies in this case. I'm saying, houseplants should be brought in at the beginning of September, before the heat comes on and of course, before it freezes. The plants need to get acclimated to being in the house, before the heater comes on. So, bringing in my plants at this late date, is not something I recommend, but obviously something I'm doing.
Steptocarpella doesn't like freezing weather.

This streptocarpella wasn't going to come in, anyway, but it really doesn't like the cold. In the African violet family, it likes warm temperatures, and is easily damaged by cold. The brugmansia looks sad, but can be cut back, and will be fine.
My recommendations for moving plants inside, includes washing them off well with the hose, hopefully washing away any unwanted guests above the soil. You could also spray them with an insecticidal soap, making sure to wet the undersides of the leaves, as well.  To discourage under soil visitors, you can soak your plants in a bucket of water for a while and usually all the inhabitants will exit the soil. (Never leave the plants in the water longer than overnight~drowning them is not the goal.) Let them drain well and dry out some before bringing them in.
Acclimate your plants first. This process helps the plant get used to a lower light level gradually. Just as we shouldn't take a plant outside in the spring and place it in the full sun, we shouldn't bring a plant from the full sun, directly into the house. Placing your plant in a semi-shady spot, such as under a tree, or under a deck for a week or more, will help it become accustomed to being in less light, before you bring it into your home. It doesn't matter where you put your plant in your house, washing the windows can make a huge difference. Dirty windows don't allow the light through as well as sparkling, clean windows. Your plants will love you for it.
I personally treat my plants with a systemic insecticide, such as Bonide Systemic Houseplant Insecticide. It contains imidicloprid, an insecticide that works very well on the insects that attack houseplants. It lasts for a long time and seems to knock out even mealybugs. I've been burned before by mealybugs, and will go to great measures to avoid them. I do not let any of my kitties near a plant that has been treated, though. The same could be said of small children. (I do not have any of those.) The insecticide spreads throughout the plant and if an animal or child chewed on a leaf, they would be ingesting the insecticide, also.  Always follow the directions on the container and use precautions around your pets and children.
Prepare the spot they are moving to in the house. A saucer is a must, to protect your floors and windowsill from water damage. Do some research, and decide which exposure is best for each plant. With a little preparation, your plants can do very well coming in from their summer vacation.


Thursday, October 27, 2011

Amaryllis Care

Have you bought an amaryllis bulb, had it bloom beautifully the first year, and then never see a bloom again? I have. I've learned it is the post-blooming care that makes the difference. Let's start from the beginning.
Buy a large, firm bulb. By this I mean, buy the largest bulb you can afford.The larger the bulb, the more bloom stalks and blooms you will have.  Amaryllis bulbs can be found almost anywhere at holiday time. Ones pre-packaged in boxes with the pot and soil included, usually aren't the biggest or best bulbs. Purchase your amaryllis where they are loose in a box, usually at an independent garden center. By purchasing your bulb like this, there will be more varieties to choose from. Maybe even unusual ones. Buy appropriate soil. The bag of soil that comes in the pre-packaged ones is  mostly peat, and is too heavy and holds too much water. Quite often the bulb will bloom in that soil, but  doesn't grow after that. It may even get moldy and rot. A well-drained soil is a must. Never waste your money on cheap soil! The soil in any plant makes ALL the difference! Secondly, check the bulb for any soft spots or mold.
Pot only an inch larger all around than the bulb.

Okay, now for the pot. Amaryllis bulbs like to be snug in their pots. With that in mind, choose one that is only 1' or so bigger than the bulb itself. It goes without saying, make sure there is a drainage hole in the pot. 
Next, soak the roots in water for a few hours before planting, not immersing the whole bulb, just the roots. This will give the bulb a head start, as they've been stored and are quite dry.  Now, the bulb is ready to be planted. When potting it up, keep part of the bulb above the soil line, as in the picture above. Usually 1/4-1/3 of the bulb is adequate.
Amaryllis papillo
Water well once, and place in a bright, warm spot. Once the green flower stalk appears, water regularly when needed. Sit back and wait for the show. In 6-8 weeks, there should be a fabulous display of flowers. If you start this process in the beginning of November, you will be enjoying flowers in time for the Christmas holiday. This makes a beautiful hostess gift, or the perfect gift for a gardener, or shut-in. I've given one to a friend in a nursing home, and they loved watching it grow and bloom. 
Let the leaves grow, fertilizing regularly
Now, for the post-bloom care. When the last flower fades on the flower stalk, cut it off near the bulb top. The leaves may already be growing. These leaves are replenishing the bulb's energy. By encouraging these leaves to be as healthy as possible, you are ensuring that it will flower the next year. Many people place them outside for the summer. This is fine, or you could just keep it in a nice sunny window. Make sure it is fertilized on a regular basis, at least once a month from March-August. On or near Labor Day, discontinue watering and let the foliage die down naturally, or just cut it off. I cut mine off. Now, keep it dry. Check it every so often to make sure the bulb isn't shriveling. If it is, add a small amount of water. The bulb is resting.
Resting bulb.
Decide when you would like it to bloom again, and 6-8 weeks before that date, you can start watering again. If you want Christmas blooms, start the process over again in November. I also like to scrape an inch or so of the old soil off the top and replenish it with fresh soil.

I've found a little care is all that's needed to have beautiful blooms on your amaryllis. As the years go by, your bulb will multiply. You can plant the "babies" up by themselves, or just keep potting the whole "family" up into a slightly bigger pot. In a few years, you will have a pot full of bulbs and blooms


Friday, October 14, 2011

Pets and Our Plants

Sago palm (Cycas revoluta)
A few days ago I received a call regarding a family who had  lost their puppy when it ate parts of a sago palm. My brother had seen the story on his local news.  Please see the following link:   http://www.woodtv.com/dpp/news/local/kent_county/Some-houseplants-deadly-to-pets. The dog in the story ate leaves and roots of the sago palm and died. Sago palms (Cycas revoluta) contain a toxin called cycasin that is deadly. These plants have become very popular in the last few years, sold as bonsai in the big box stores. They are relatively easy to grow and the foliage is very architectural.
I obviously am a big fan of houseplants and hope that incidents such as this do not prevent pet owners from having plants in their homes. Plants are very good for your health and should not be avoided because of pets. More tragedies like this can be prevented with a little knowledge.
Boston fern (Nephrolepsis exaltata)
African violet (Saintpaulia)
Pony tail palm (Beaucarnea recurvata)

Grape ivy (Cissus rhombifolia)
Prayer plant (Maranta leuconeura)
Rabbit's foot fern (Davallia)

Pellionia repens
If you find a plant you are interested in, research it to make sure it is non-toxic to your pet.  There are many plants that aren't poisonous and can safely coexist with your pets. A few poplar, easily obtained plants that are safe, include African violet (Saintpaulia), boston fern (Nephrolepsis exaltata), pony tail palm (Beaucarnea recurvata), grape ivy (Cissus rhombifolia), spider plant (Chlorophytum comosum), prayer plant (Maranta leuconeura), pellionia repens, and  rabbit's foot fern (Davallia). I have all these plants in my home and I also have 3 cats. The cats have occasionally eaten my plants, especially the pony tail palm and the spider plant. They then proceed to  throw up, but have never had any other adverse effects from eating them. I do try to keep them away from the plants, but in my house, they are surrounded. Everywhere they turn, there is a plant. I think they are bored by them, because there are so many, and so they mostly leave my plants alone. I have no experience with puppies, but have heard they are a little more rambunctious and eat everything.
Rex begonia
Other safe plants include: Echeveria, areca palm, Christmas cactus (Schlumbergera), hoyas, yucca, gerber daisies, swedish ivy (Plectranthus australis), peperomia, and rex begonias. Remember to research the plant you are bringing into your home and you and your pets can be safe and happy.

Thursday, September 29, 2011

African Violet Tree?

Is your African violet looking more like a small tree, than a normal violet?  Does it look like the violet in the picture? I'm embarrassed to even admit that this is my violet. I have let this get too dry, then watered it too much too quickly, and should have re-potted it long ago. It's a miracle it's alive after the abuse it has received. I'm going to demonstrate, with pictures, how I rejuvenated this plant. When I'm done, it will be hard to believe it is the same plant.
Sad, neglected violet. 


Violet "trunk" with brown scabs, after removing dead leaves.
"Trunk" after being scraped with knife.
First,  I have removed any brown, dry leaves and mushy leaves.  The resulting stem or "trunk" is revealed. The plant is looking better, but still sad. The next step is to take a sharp knife and carefully scrape the trunk all around the entire length. This step gets rid of the brown scabs remaining after the leaves have been removed. 
You can see in the next picture, the brown scabby tissue is gone, leaving fresh green plant tissue.
Violet with root ball cut away.


Violet placed back in the same, clean pot.

Now, I remove the plant from its pot. I then take a knife and cut away approximately 1/2 of the root ball. I want to take away as much root ball as there is "trunk" length. So, for example, if  I have 1" of "trunk" showing, then I will cut away 1" of the soil ball. Sometimes the stem can be so long, the entire root ball may have to be removed. This is only necessary on a plant that has been allowed to grow a "trunk" for a very long time. The result of this drastic measure being, only a rosette of leaves and a short stem remain. The stem with the rosette of leaves, is then planted in a pot of soil, with the soil coming up to the bottom of the first set of leaves. The entire plant would then have to be placed in a plastic bag. This will allow the plant to recover and grow a whole new set of roots, as if in a miniature greenhouse. The plastic bag will keep the moisture in and  keep the plant from wilting. The plastic can be removed when the plant starts growing again.  One should never let their plant get this bad, but sometimes it happens.
After washing the pot the violet came out of, to remove any unwanted residue, I will re-pot the violet into the same pot. Most standard violets will never need a pot larger than 4", so I don't need to use a larger pot.
By cutting away a portion of the root ball, I then can plant the violet back in the same pot. Covering the stem with fresh soil will allow it to grow new roots and the violet will be like a whole new plant. I water it well, let it drain, and allow the foliage to dry. It is a fallacy that you can't get water on violet leaves. They need a shower once in a while, like any other plant. Leaving  the violet out of the direct light until it is dry is the secret. Also, use warm water, not cold. Cold water will leave marks on the leaves.

After re-potting.

Top view of re-potted violet.

Look at these two pictures. It doesn't in any way resemble the sad plant in the first picture. It looks like it just spent a day at the spa for plants. It came out refreshed, rejuvenated, and looking great. The last thing I did and it could have been done earlier, is the removal of any flowers or buds. The plant does not need to expend any energy on flowering at this time. It needs to use all its energy to make new roots. It's hard to see, but there is a flower bud to the left in the first re-potted picture. It is hard to cut potential flowers off, since that's really why we grow these plants, but it is better for the over-all health of the plant, to remove them.
I have a plant that looks new, fresh and will be blooming again in no time.